
Set E6013 Amps by Rod Diameter and Position
Optimizing E6013 Welding Rod Amperage for Diameter and Position
The E6013 Welding Rod is renowned for its versatility and ease of use, making it a staple in workshops for mild steel fabrication, repairs, and general purpose welding. While E6013 is forgiving, achieving optimal weld quality, penetration, and appearance hinges significantly on selecting the correct amperage settings. For production leads and welders, understanding how to fine-tune these parameters based on rod diameter and welding position is crucial for efficiency and superior results.
This guide provides a comprehensive approach to setting E6013 amperage, helping you achieve consistent, high-quality welds. As a trusted B2B partner, Oldwelders is committed to delivering excellence in welding consumables and equipment, a commitment underscored by our ISO 9001 certification. We understand the precision required in industrial applications and offer products designed to meet rigorous standards.
Understanding the E6013 Electrode
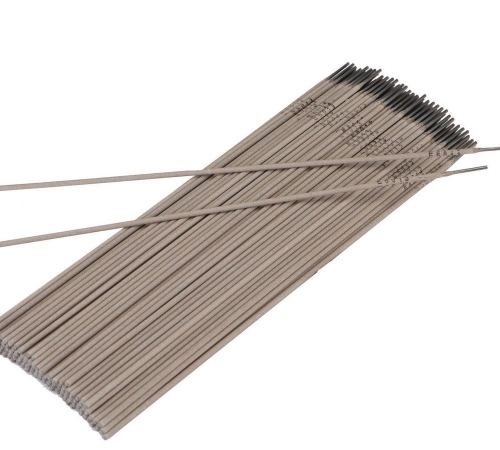
The E6013 electrode is a mild steel, all-position, rutile-coated electrode suitable for both AC and DC welding machines. Its key characteristics include a smooth, stable arc, excellent re-striking capabilities, and easy slag removal, which often self-lifts. These properties make it ideal for a wide range of applications, from general fabrication and sheet metal work to light structural welding and repair jobs where aesthetic appearance is important.
The rutile coating contributes to its smooth operating characteristics, producing a molten puddle that is easy to control, even for less experienced welders. This makes E6013 a popular choice for situations demanding good bead appearance and minimal post-weld cleaning. It performs well on dirty, rusty, or painted surfaces, though proper surface preparation always yields superior results. For businesses seeking reliable and versatile welding materials, Oldwelders provides a comprehensive range, including high-quality electrodes designed for consistent performance across various industrial applications.
Amperage Guidelines by Rod Diameter for E6013 Welding Rods
The primary factor determining your starting amperage for E6013 welding is the diameter of the rod. Larger diameter rods require more current to melt effectively and maintain a stable arc, while smaller rods demand lower amperage to prevent burn-through on thinner materials. It is crucial to remember that the ideal E6013 Welding Rod amperage will always fall within a specific range, allowing for fine adjustments based on material thickness, joint configuration, and welding position.
Here are general amperage guidelines for common E6013 rod diameters:
- 2.0 mm (5/64 inch): 40-70 Amps
- 2.5 mm (3/32 inch): 60-100 Amps
- 3.2 mm (1/8 inch): 80-130 Amps
- 4.0 mm (5/32 inch): 110-170 Amps
- 5.0 mm (3/16 inch): 150-220 Amps
When selecting the correct E6013 Welding Rod diameter, consider the thickness of the base metal. For thinner materials (e.g., 1.5mm to 3mm), a 2.5mm or 3.2mm rod is typically suitable. For thicker sections (e.g., 5mm and above), a 4.0mm or 5.0mm rod might be more appropriate to ensure adequate penetration and fill. Always start in the middle of the recommended range and make small adjustments (5-10 amps) as needed. The quality and consistency of electrodes are paramount for predictable amperage performance, a principle Oldwelders upholds through our stringent ISO 9001 certified manufacturing processes.
Adjusting Amps for Welding Position with E6013 Welding Rods
Gravity significantly impacts the molten weld puddle, requiring welders to adjust amperage settings when moving from flat positions to more challenging vertical or overhead orientations. These adjustments help maintain control of the puddle, prevent sagging or dripping, and ensure proper fusion and bead profile. Oldwelders ensures consistent performance, whether you are using our arc welding machine or other specialized equipment.
Flat (1F/1G) and Horizontal (2F/2G) Positions
In flat and horizontal positions, gravity works in your favor, helping to keep the molten puddle in place. This allows for higher amperage settings, typically towards the middle to upper end of the recommended range for the chosen rod diameter. Higher amperages provide deeper penetration and faster travel speeds, making these positions ideal for achieving maximum deposition rates and efficiency on heavier materials.
Vertical Up (3F/3G-Up)
Welding vertical up requires careful puddle control against gravity. For E6013 rods, you will generally need to reduce the amperage to the lower end of the recommended range. This keeps the puddle smaller and cooler, preventing it from sagging or dripping. A "whip and pause" technique is often employed, where the electrode is momentarily moved upwards to allow the puddle to freeze slightly, then dipped back down to add more filler metal. This technique, combined with lower amps, ensures a controlled, strong weld bead.
Vertical Down (3F/3G-Down)
Vertical down welding is typically used for thinner materials or cosmetic passes where penetration is not critical. While it offers faster travel speeds, it generally results in less penetration and a weaker weld compared to vertical up. Amperage settings for vertical down are often slightly higher than vertical up, but still on the lower side of the rod's overall range, to ensure a fluid puddle that keeps moving quickly down the joint.
Overhead (4F/4G)
Overhead welding is arguably the most challenging position, as gravity constantly pulls the molten metal downwards. To counteract this, amperage settings must be at the very lowest end of the recommended range for the rod diameter. Maintaining a very short arc length and using small, controlled stringer beads are essential. The goal is to minimize the size of the molten puddle and allow it to freeze quickly before gravity can cause it to drip. This position demands patience and precise technique.
Recognizing and Correcting Amperage Issues
Proper amperage is the bedrock of good welding. Deviations, whether too high or too low, manifest in distinct ways that can compromise weld quality, integrity, and efficiency. Recognizing these signs quickly allows for immediate correction, saving time and material.
Signs of Amperage Too Low
- Poor Arc Starting and Sticking: The electrode struggles to ignite or frequently sticks to the workpiece.
- Lack of Fusion: The weld metal does not properly melt into the base metal, resulting in weak joints.
- Convex, Ropy Bead: The weld bead is excessively tall, narrow, and has a "roped" appearance, indicating insufficient heat input.
- Excessive Spatter: Low amperage can cause the arc to be unstable, leading to increased spatter.
- Incomplete Penetration: The weld does not fully penetrate the joint, creating weak points.
If you observe these issues, incrementally increase your amperage by 5-10 amps until the arc becomes stable, the puddle is fluid, and the bead profile improves.
Signs of Amperage Too High
- Burn-Through: The molten puddle completely melts through the base metal, especially on thinner sections.
- Excessive Penetration: While some penetration is good, too much can weaken the base metal or create an undesirable bead on the back side.
- Wide, Flat Bead: The weld bead is excessively wide and flat, often with a deep crater at the end.
- Undercut: The base metal along the edge of the weld is melted away, creating a groove.
- Rapid Rod Consumption: The electrode melts away too quickly, making it difficult to control the weld puddle.
- Difficult Slag Removal: The slag can fuse tightly to the weld bead, making it hard to chip off.
If you encounter these problems, reduce your amperage by 5-10 amps until the puddle becomes more controllable, and the weld defects diminish. Always test your settings on scrap material of the same thickness and type before welding on your actual project.
Partnering with Oldwelders for Welding Excellence
At Oldwelders, we understand that precise amperage settings are only one part of the equation for successful welding. The quality of your welding consumables and equipment is equally critical. We are dedicated to providing industrial clients with high-performance solutions that ensure consistency, reliability, and superior results.
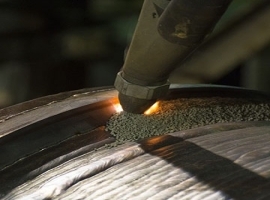
Our manufacturing capabilities exemplify this commitment. Our plant covers an area of 1000 square meters and has six production lines, which can supply 100 tons a day. The raw materials of our flux products, such as excellent dolomite, bauxite, and cryolite, are melted at 2000 °C, ensuring superior quality in every batch of welding fluxes and electrodes. This meticulous process guarantees that our products, from welding machines to welding wire and rods, consistently meet the highest industry standards.
We cater specifically to the demands of B2B operations, offering a minimum order quantity of 1 ton and a reliable lead time of 30 days for bulk orders. Our extensive experience serving diverse international markets, including Brazil, Thailand, Australia, and Malaysia, highlights our capability to meet global industrial needs with efficiency and professionalism. Oldwelders provides the consistent quality needed for every E6013 Welding Rod.
Conclusion
Mastering the proper amperage settings for your E6013 Welding Rod is fundamental to achieving high-quality, durable welds across various applications and positions. By understanding how rod diameter and welding position influence current requirements, and by recognizing the tell-tale signs of incorrect amperage, welders and production teams can significantly enhance their operational efficiency and the integrity of their work. Fine-tuning these parameters through practice and observation will lead to consistent, professional results.
Oldwelders stands as your trusted partner, providing the premium welding consumables and machinery necessary to meet the most demanding industrial specifications. Our commitment to quality, backed by robust production capabilities and adherence to ISO 9001 standards, ensures that you receive products that perform flawlessly. By understanding these variables, you can ensure optimal performance from every E6013 Welding Rod.