
E6013 Welding Rod Amperage Settings by Diameter
Selecting the Right Amperage for an E6013 Welding Rod is Crucial for Weld Quality
The E6013 electrode is a mainstay in fabrication shops and field operations worldwide. Prized for its versatility, smooth arc, minimal spatter, and ease of use, it is a go-to choice for welding mild carbon steel in a variety of applications. However, achieving the clean, strong welds this electrode is known for depends entirely on setting the correct machine parameters. The most critical of these is amperage, and it is directly linked to the diameter of the rod you are using.
Choosing an amperage that is too low results in a sluggish arc, poor penetration, and a convex, ropey bead that fails to fuse with the base metal. Conversely, setting the amperage too high can lead to excessive spatter, deep and uncontrolled penetration, undercut, and even burn-through on thinner materials. For fabrication supervisors and professional welders, mastering the relationship between rod diameter and amperage is not just a matter of technique—it's a matter of structural integrity, project efficiency, and profitability. This guide provides a detailed technical breakdown of amperage settings for the E6013 welding rod, factors that influence fine-tuning, and the importance of sourcing high-quality consumables for predictable results.
Understanding the Core Relationship: Diameter, Amperage, and Heat
The fundamental principle governing amperage selection is straightforward: the larger the diameter of the electrode's core wire, the more electrical current (amperage) is required to melt it at a controlled rate. This current flowing through the electrode creates the arc, which generates the intense heat needed to melt both the electrode and the base metal, forming the weld pool.
Think of the electrode's diameter as the size of the pipeline for electrical energy. A small-diameter rod, like a 2.5mm (3/32"), has a smaller cross-sectional area and requires less current to reach its melting point. A larger 4.0mm (5/32") rod has a much larger cross-section and demands significantly more amperage to establish and maintain a stable arc and achieve proper deposition.
This relationship is critical because amperage directly controls the heat input into the workpiece. Heat input dictates several key weld characteristics:
- Penetration: Higher amperage generates a more forceful, hotter arc, leading to deeper penetration into the base material. This is essential for ensuring a strong root in butt joints but can be detrimental on thin-gauge steel.
- Deposition Rate: Increased amperage melts the electrode faster, increasing the amount of filler metal deposited per minute. This can improve productivity but requires a corresponding increase in travel speed to maintain a proper bead profile.
- Weld Pool Fluidity: A hotter arc creates a more fluid weld pool. While this helps the weld "wet out" and fuse smoothly at the toes, an overly fluid puddle can be difficult to control, especially in vertical or overhead positions.
The goal is to find the "sweet spot"—an amperage setting that provides a stable, easily controlled arc, sufficient penetration for the joint design, and a smooth, uniform bead appearance without excessive spatter or undercut.
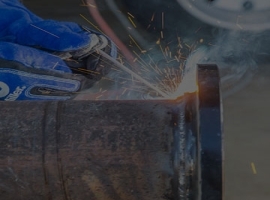
Recommended Amperage Ranges for Common E6013 Diameters
While every welding machine and application has slight variations, there are established industry-standard amperage ranges that serve as an excellent starting point for any job. These ranges are typically printed on the electrode packaging. As a reliable B2B supplier, we ensure our product specifications provide clear guidance. Below are the typical operating ranges for common E6013 electrode diameters when used with an arc welding machine.
It is important to note that the E6013 is an all-purpose electrode that performs well on AC, DC Positive (DCEP), and DC Negative (DCEN) polarity. The ranges below are general guidelines; DCEP often runs slightly hotter and provides deeper penetration, while DCEN offers a softer arc with less penetration, which can be useful for sheet metal.
2.0mm (5/64") Diameter
- Typical Amperage Range: 40 – 70 Amps
- Common Applications: Ideal for welding very thin materials, such as 16-gauge (1.5mm) to 12-gauge (2.5mm) sheet metal. Its low heat input minimizes the risk of warping and burn-through. It is excellent for tack welds, ornamental ironwork, and repairs on thin-walled tubing.
2.5mm (3/32") Diameter
- Typical Amperage Range: 60 – 100 Amps
- Common Applications: This is arguably one of the most versatile and widely used sizes. It is perfect for general fabrication and repair work on materials from 2mm to 6mm (approx. 1/4") thick. It offers a great balance of deposition rate and control for various positions.
3.2mm (1/8") Diameter
- Typical Amperage Range: 80 – 130 Amps
- Common Applications: A workhorse for structural and fabrication jobs involving steel that is 3mm (1/8") to 10mm (3/8") thick. This diameter provides a higher deposition rate than its smaller counterparts, making it more efficient for filling fillet welds and V-groove butt joints.
4.0mm (5/32") Diameter
- Typical Amperage Range: 110 – 170 Amps
- Common Applications: Used for heavier fabrication on steel plates 6mm (1/4") and thicker. The high amperage and deposition rate make it suitable for multi-pass welds on structural beams, heavy equipment repair, and shipbuilding applications where significant metal fill is required.
5.0mm (3/16") Diameter
- Typical Amperage Range: 150 – 220 Amps
- Common Applications: Reserved for heavy-duty applications on thick plates, typically 10mm (3/8") and above. This size is primarily used in the flat and horizontal positions due to the large, fluid weld pool it creates. It is common in heavy structural fabrication and large-scale manufacturing.
Critical Factors for Fine-Tuning Your Amperage Setting
The ranges provided above are starting points. A skilled welder must adjust the final amperage based on several real-time variables. Ignoring these factors can lead to subpar welds, even when operating within the recommended range for a given E6013 welding rod.
1. Welding Position
The force of gravity has a significant impact on the molten weld pool. An amperage setting that works perfectly in the flat position will likely be too hot for out-of-position work.
- Flat (1F/1G): Can tolerate the highest amperage within the rod's range. The heat helps ensure good fusion, and gravity helps shape the bead.
- Horizontal (2F/2G): Requires a slight reduction in amperage from the flat position to prevent the weld pool from sagging.
- Vertical (3F/3G): Amperage must be reduced significantly, typically to the lower end of the recommended range. This keeps the weld pool smaller and more controllable, preventing it from dripping down. Vertical-up welding generally tolerates slightly more heat than vertical-down.
- Overhead (4F/4G): This is the most challenging position and requires the lowest amperage setting. A "colder" arc is necessary to keep the weld pool from falling out of the joint.
2. Base Metal Thickness
The thickness of the steel being welded directly influences how much heat it can absorb without distortion or burn-through.
- Thin Material (e.g., <3mm): Always use the lower third of the amperage range for the selected electrode. The primary goal is to establish fusion without melting through the material. A smaller diameter rod is often the better choice.
- Thick Material (e.g., >10mm): Can handle amperage in the upper end of the range. The greater mass of the material acts as a heat sink, drawing heat away from the weld zone and requiring a hotter arc to achieve deep penetration, especially on root passes.
3. Joint Design and Fit-Up
The type of joint and the gap between the pieces will affect the ideal amperage.
- Open Root Butt Joints: Require lower amperage, especially for the root pass, to avoid melting the edges and creating an excessively large keyhole.
- Tight Fit-Up or Fillet Welds: Can tolerate higher amperage to ensure the arc penetrates deep into the corner of the joint.
- Wide Gaps: May require a lower amperage and a specific weaving technique to bridge the gap without burning through the edges.
Sourcing Quality Electrodes for Consistent and Predictable Performance
All the technical knowledge of amperage settings is rendered useless if the welding consumables are inconsistent. A high-quality electrode will have a concentric flux coating, uniform core wire diameter, and precise chemical composition from one rod to the next. This consistency is what allows welders to "dial in" their settings and trust that the arc will behave predictably every time.
At Oldwelders, we understand that our industrial clients in markets from Brazil to Australia depend on this reliability. As an ISO 9001 certified manufacturer, our production process is governed by strict quality control protocols. This certification is not just a badge; it is a guarantee that every box of our AWS E6013 welding electrodes adheres to the highest international standards for consistency and performance.
Our 1000-square-meter facility, equipped with six modern production lines, enables us to maintain a production capacity of 100 tons per day. This scale allows us to serve large B2B orders without compromising on quality. For our partners in Thailand, Malaysia, and beyond, we offer a streamlined procurement process with a minimum order quantity (MOQ) of 1 ton and a typical lead time of just 30 days, ensuring your production lines are never waiting for essential welding materials.
In conclusion, while the diameter of an E6013 electrode is the primary determinant of its amperage range, true mastery comes from the ability to intelligently adjust that setting based on the demands of the job. By starting with the recommended ranges and fine-tuning for position, material thickness, and joint design, welders can unlock the full potential of this versatile electrode. Pairing this technical skill with consistently manufactured, high-quality consumables is the ultimate formula for producing strong, clean, and efficient welds every time.